Friday, September 7, 2012
Harvest Soup
Inspired by a family member, I decided to try putting a days harvest into a pot and turning it into soup. Lots of tomatoes this year, so I filled the pot with them - skins, cores, seeds and all. I added peppers (including one very hot one), garlic and sage all from the garden. From the pantry I added two carrots, two stalks of celery, onion, peppercorns. I let it simmer for a couple of hours, removed the tomato skins and sage twig then blended it right in the pot with the stick blender.
I've never had a stick blender before and I am blown away. Easy and Amazing results! It blended all this wonderful whole foods into the tastiest tomato base. The first time I made it, I turned it into Spicy Tomato Soup, which I served with grilled cheese for a trip down memory lane. I simply added milk to the base after I let it reduce after blending. I like to call it Spicy Tomato Bisque because it sounds fancy, but it doesn't involve seafood, so therefore not truly a bisque.
I've made it a second time, this time I did not remove the tomato skins, and it blended just as well. I also cleared out the veggie drawer, adding mushrooms, zucchini and a small handful of spinach. It blended beautifully, tasted even better than the first and became Chicken Taco Soup.
We have another batch of tomatoes ready for picking and it's destined to become a concentrated base that I'm going to freeze in small zipper freezer bags. By allowing the blended soup to simmer and reduce, I'll end up with soup starter in a bag.
It's so easy, healthy and delicious! I just had to share. I hope it inspires you the way I was inspired!
Friday, July 6, 2012
Electricity
Like a million other people, we were affected by the storms and lost power for days. Thanks to my forward thinking, handy husband we have a generator and were able to power the fridge, freezer, one light, the water pump, a couple of fans, and the LED tv. We are blessed. We lost some limbs, but no damage to the house or cars. We are blessed.
There are still people without power and it's supposed to over 100 today and tomorrow. So for just a minute I'm going to focus all my positive energy in a single direction and pray that everyone is able to thrive during this time.
Last year we chose not to use the air conditioner. Primarily because it was quite old and needed frequent repairs, second because I prefer actual air, not conditioned air, third because we create a better world when we more thoughtfully use our resources. This year, we decided to replace our old unit.
Actually, we've been purposefully replacing all our old appliances and electronics to improve our houses overall energy usage. It started with the television last year, which we replaced a plasma with an LED TV. The picture quality is fantastic. The screen size is exactly the same, but the housing and weight of the TV is greatly reduced. The best part is the energy usage is less than half for the LED.
That started me thinking about what else in our house was ancient. Replacing the fridge reduced our monthly electric bill by $20 - no joke. The old fridge was more than 10 years old and was a very basic model. The new fridge, with all the modern technology, is rated at $51 dollars a year (actual usage may vary ;). $5 a month!
We've replaced light bulbs (LED's are quite expensive, but I've begun switching to them as the cost to run is so minimal); the dishwasher, and the washing machine. All of which have contributed to an overall smaller electric bill which means less energy usage.
So, we started looking at air conditioners. Last year it was pretty uncomfortable in August and this year we'd already experienced several 90 degree days. Plus, the old unit was 15 years old and we just couldn't see putting more money into it. In addition, the furnace was also 15 years old and not very efficient either. Turns out we would benefit from a whole new heating/cooling system.
After several quotes and much consideration we jumped in with both feet. There are a lot of choices and you just have to go with your instincts. My best advice: educate yourself, get more than one quote, stick to your budget, keep an open mind, trust your instincts. (Actually that advice is good for everything, isn't it?)
They came, spent two days, left us with more than we expected, wouldn't leave until we were happy - and we are. One full month into it, we are happy! It has been quite a month of high temps, storms and power outages, but every single time it kicks on, or we come into the house, we are happy. It's quiet, cool and best of all efficient. Our old unit cost us at least $100 every month we used it. This unit was just $45 for this first month. Chances are it will be higher as the summer progresses.
There are still people without power and it's supposed to over 100 today and tomorrow. So for just a minute I'm going to focus all my positive energy in a single direction and pray that everyone is able to thrive during this time.
Last year we chose not to use the air conditioner. Primarily because it was quite old and needed frequent repairs, second because I prefer actual air, not conditioned air, third because we create a better world when we more thoughtfully use our resources. This year, we decided to replace our old unit.
Actually, we've been purposefully replacing all our old appliances and electronics to improve our houses overall energy usage. It started with the television last year, which we replaced a plasma with an LED TV. The picture quality is fantastic. The screen size is exactly the same, but the housing and weight of the TV is greatly reduced. The best part is the energy usage is less than half for the LED.
That started me thinking about what else in our house was ancient. Replacing the fridge reduced our monthly electric bill by $20 - no joke. The old fridge was more than 10 years old and was a very basic model. The new fridge, with all the modern technology, is rated at $51 dollars a year (actual usage may vary ;). $5 a month!
We've replaced light bulbs (LED's are quite expensive, but I've begun switching to them as the cost to run is so minimal); the dishwasher, and the washing machine. All of which have contributed to an overall smaller electric bill which means less energy usage.
So, we started looking at air conditioners. Last year it was pretty uncomfortable in August and this year we'd already experienced several 90 degree days. Plus, the old unit was 15 years old and we just couldn't see putting more money into it. In addition, the furnace was also 15 years old and not very efficient either. Turns out we would benefit from a whole new heating/cooling system.
After several quotes and much consideration we jumped in with both feet. There are a lot of choices and you just have to go with your instincts. My best advice: educate yourself, get more than one quote, stick to your budget, keep an open mind, trust your instincts. (Actually that advice is good for everything, isn't it?)
They came, spent two days, left us with more than we expected, wouldn't leave until we were happy - and we are. One full month into it, we are happy! It has been quite a month of high temps, storms and power outages, but every single time it kicks on, or we come into the house, we are happy. It's quiet, cool and best of all efficient. Our old unit cost us at least $100 every month we used it. This unit was just $45 for this first month. Chances are it will be higher as the summer progresses.
Friday, June 15, 2012
True Story of an Everyday Hero who Squared a Quilt!
Okay... This is going to a little difficult because I don't have actual pictures from the event. But I think it's important to document for anyone else out there who might be trying to figure out how to get a reasonably square quilt at the end of the process.
First of all, when I was making the strip quilt for my son, none of the rows were the exact same length. The way I worked the cutting of the strips was to make them all the same height, but I didn't do anything to decision the length. That was determined by the fabric and how much shrinkage occurred in the wash. Because all fabric shrinks differently and because I used embroidered panels, which were all different sizes, and because I did not want any seams to line up, the edges of the finished quilt top were very uneven.
At the point where the quilt had been quilted and it was time to sew the binding on, I absolutely had no idea how to proceed. I read every blog entry, watched every You Tube video, and checked out every available book from the library. I researched for a day and a half to no avail. No where could I find an honest discussion of what to do if your quilt top isn't magically square. Now I realize that not everyone has my inability to get the seams to line up, but come on! I don't believe for one minute that every quilter hasn't struggled with edges that are out of square at least once.
And if there is a good discussion of it, I could not find it.
Graduation is looming and I'm beginning to freak out. Though my husband doesn't quilt or sew, he is the handiest person I know and has an abundance of common sense. Sometimes I find that just by talking in through with someone else I can arrive at the solution and I was hoping this was the case this time. So I say to my husband "I need some help trying to figure out how to get this quilt square." "Ok." is his reply.
Several hours later, I'm hanging out the back door yelling into the looming darkness "I really need some help trying to figure out how to get this quilt square or square-ish". There is an element of frantic desperation in that phrase.
He comes in, looks at the quilt, I explain what needs to happen and what my thoughts are. (My plan was to tape a piece of yarn to each side of the top of the quilt, eyeball it and cut. He says why don't we just run some painters tape all the way down each side. Okay! So we do that. It doesn't look even. I adjust by picking the tape up, moving it a little and sticking it back down. My youngest strolls through, looks at it and says it isn't straight. He adjusts. I look at it - it still doesn't look straight. Hubby looks at it, adjusts the tape and then we both look at it. It just doesn't look straight.
Now, I'm going to tell you the truth, though it ain't pretty... At this point I'm on the edge. We are standing there looking at this thing, it's the night before graduation and by now it's 9:30 at night. I've been working on this quilt for two solid days and it was HOT! I can feel the tears welling up and I hear myself saying "I just need to suck it up and cut it." I'm not sure, but I think I might have stamped my foot in frustration. My husband lays a hand on my arm and says "Well, hold on now. We just need to think about this a minute because I'm sure we can get it lined up."
He begins talking about pinning the corners & measuring diagonally and I start crying in earnest. He may as well have been speaking a foreign language for as much of that as I understood in that moment. But, as I have no ideas and I trust him with my life I say okay. I took a minute to blow my nose and drink some water, then asked him to explain again. And this is what we did.
We put a pin in each of the top corners of the quilt. Measured that distance (68"). Then we measured down the side of the quilt to the same distance on each side (78") and put pins in the bottom corners at the same width as the top measurement. So the pins were marking the quilt at 68 x 78. Then we took the two diagonal measurements and compared the numbers. Because they were not the same meant we had a parallelogram, rather than a rectangle. By moving each of the top pins over an inch, measuring the two diagonals again, moving the pins another 1/4 inch, we ended up with a rectangle. Once we were sure of the pin placement, we moved the tape to the inside of the pins and cut.
I was afraid, but I'll be darned if it didn't work. Even after sewing on the binding, those quilt corners all meet up. I hope I've explained this fairly well and that even without pictures it can help you if you find yourself in a similar situation!
And that is the true story of an everyday hero who made a quilt square and saved his wife's sanity ♥
First of all, when I was making the strip quilt for my son, none of the rows were the exact same length. The way I worked the cutting of the strips was to make them all the same height, but I didn't do anything to decision the length. That was determined by the fabric and how much shrinkage occurred in the wash. Because all fabric shrinks differently and because I used embroidered panels, which were all different sizes, and because I did not want any seams to line up, the edges of the finished quilt top were very uneven.
At the point where the quilt had been quilted and it was time to sew the binding on, I absolutely had no idea how to proceed. I read every blog entry, watched every You Tube video, and checked out every available book from the library. I researched for a day and a half to no avail. No where could I find an honest discussion of what to do if your quilt top isn't magically square. Now I realize that not everyone has my inability to get the seams to line up, but come on! I don't believe for one minute that every quilter hasn't struggled with edges that are out of square at least once.
And if there is a good discussion of it, I could not find it.
Graduation is looming and I'm beginning to freak out. Though my husband doesn't quilt or sew, he is the handiest person I know and has an abundance of common sense. Sometimes I find that just by talking in through with someone else I can arrive at the solution and I was hoping this was the case this time. So I say to my husband "I need some help trying to figure out how to get this quilt square." "Ok." is his reply.
Several hours later, I'm hanging out the back door yelling into the looming darkness "I really need some help trying to figure out how to get this quilt square or square-ish". There is an element of frantic desperation in that phrase.
He comes in, looks at the quilt, I explain what needs to happen and what my thoughts are. (My plan was to tape a piece of yarn to each side of the top of the quilt, eyeball it and cut. He says why don't we just run some painters tape all the way down each side. Okay! So we do that. It doesn't look even. I adjust by picking the tape up, moving it a little and sticking it back down. My youngest strolls through, looks at it and says it isn't straight. He adjusts. I look at it - it still doesn't look straight. Hubby looks at it, adjusts the tape and then we both look at it. It just doesn't look straight.
Now, I'm going to tell you the truth, though it ain't pretty... At this point I'm on the edge. We are standing there looking at this thing, it's the night before graduation and by now it's 9:30 at night. I've been working on this quilt for two solid days and it was HOT! I can feel the tears welling up and I hear myself saying "I just need to suck it up and cut it." I'm not sure, but I think I might have stamped my foot in frustration. My husband lays a hand on my arm and says "Well, hold on now. We just need to think about this a minute because I'm sure we can get it lined up."
He begins talking about pinning the corners & measuring diagonally and I start crying in earnest. He may as well have been speaking a foreign language for as much of that as I understood in that moment. But, as I have no ideas and I trust him with my life I say okay. I took a minute to blow my nose and drink some water, then asked him to explain again. And this is what we did.
We put a pin in each of the top corners of the quilt. Measured that distance (68"). Then we measured down the side of the quilt to the same distance on each side (78") and put pins in the bottom corners at the same width as the top measurement. So the pins were marking the quilt at 68 x 78. Then we took the two diagonal measurements and compared the numbers. Because they were not the same meant we had a parallelogram, rather than a rectangle. By moving each of the top pins over an inch, measuring the two diagonals again, moving the pins another 1/4 inch, we ended up with a rectangle. Once we were sure of the pin placement, we moved the tape to the inside of the pins and cut.
I was afraid, but I'll be darned if it didn't work. Even after sewing on the binding, those quilt corners all meet up. I hope I've explained this fairly well and that even without pictures it can help you if you find yourself in a similar situation!
And that is the true story of an everyday hero who made a quilt square and saved his wife's sanity ♥
Monday, June 11, 2012
Another garden project
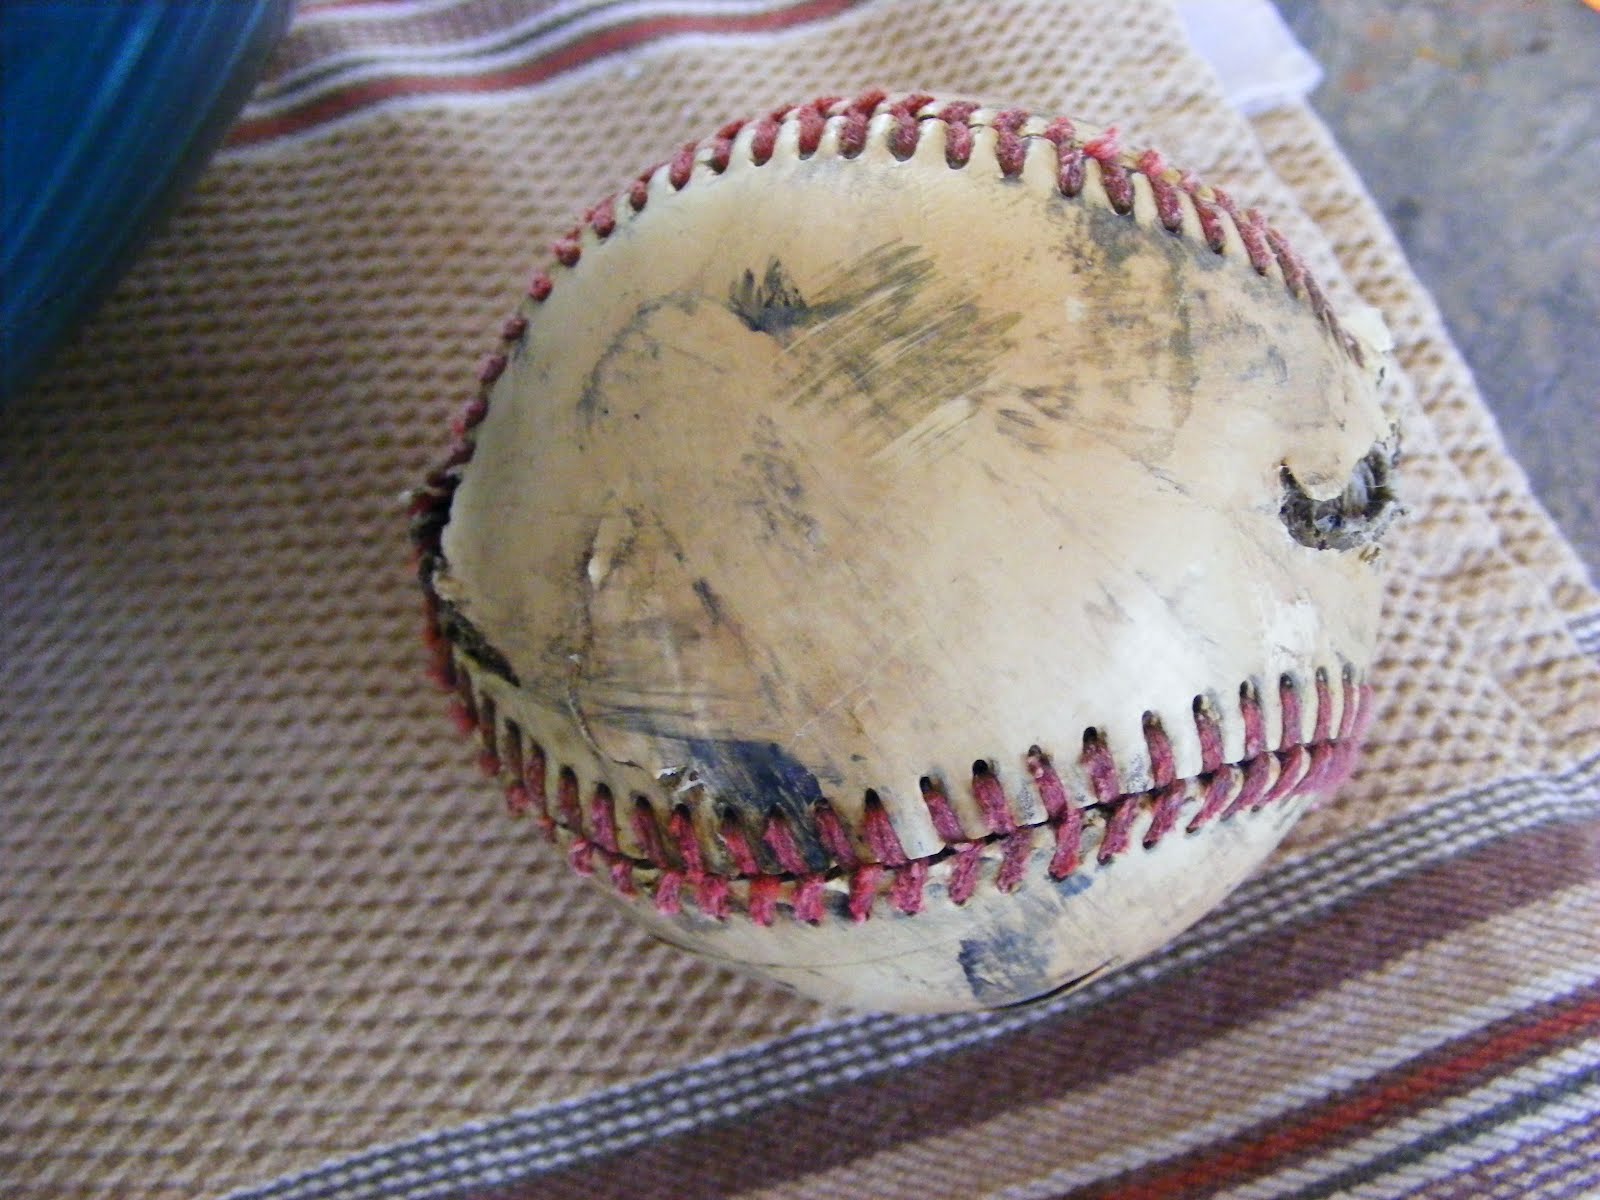
Have you ever seen a more beat up, well loved baseball? Me, either! I decided to try gluing to it and it worked out fairly well. There are a couple of pretty large gashes that were tricky to cover, but with enough glue all things are possible ;)
You can still see the baseball through the gaps and while I could have added another layer to hide that, I prefer it this way. The color of the baseball is a perfect backdrop to the creamy white stones and being able to see the stitching gives it humor and that makes it even better!
With graduation surrounding me, I've uncovered some wonderful quotes, which can be applied to your life at any time whatsoever...
“Your time is limited, so don’t waste it living someone else’s life. Don’t let the noise of others’ opinions drown out your own inner voice. And most important, have the courage to follow your heart and intuition. They somehow already know what you truly want to become. Everything else is secondary... Stay hungry. Stay foolish.” – Steve Jobs
Friday, June 8, 2012
Fun in the garden!
Seriously... Pinterest.

I discovered a photo of a bowling ball covered with pennies set out in a garden on Pinterest this week. In love. I was totally in love.
Off to the thrift store I went and found this green ball. Because it was green, I thought of these flat marbles that have been in my studio for years (yes, years.)
They are a milky green color and I mixed them with some clear ones. I used E6000 glue to adhere them. After some trial and error I found that if I put some glue on the ball and some on the marbles and let them sit for about 3 minutes, it improved the 'stick' and I had less slippage. Keep in mind though there will be slippage as you are trying to glue stuff to a round surface. It's fairly labor intensive. I glued on about half, let those dry before attempting the other half. I periodically checked on the marbles adjusting as necessary any that slipped out of place.
Funny story about this is that I thought I might be on the cutting edge as far as gluing these flat stones to a bowling ball, but no... After I began the process, while waiting for glue to dry, I started looking on the web. Lots of people sticking lots of things to bowling balls. On my list to try: pennies, marbles, buttons, sea glass.
Anyway, I love garden ornaments. I have all kinds of things in and around the plants and flowers, hanging from trees. This is the finished project in it's new home under a blue hosta. My goodness doesn't that look good! Wait, that looks like it needs another or 5 or 17 more. Now to find those bowling balls... ♥♥♥
I discovered a photo of a bowling ball covered with pennies set out in a garden on Pinterest this week. In love. I was totally in love.
Funny story about this is that I thought I might be on the cutting edge as far as gluing these flat stones to a bowling ball, but no... After I began the process, while waiting for glue to dry, I started looking on the web. Lots of people sticking lots of things to bowling balls. On my list to try: pennies, marbles, buttons, sea glass.
Anyway, I love garden ornaments. I have all kinds of things in and around the plants and flowers, hanging from trees. This is the finished project in it's new home under a blue hosta. My goodness doesn't that look good! Wait, that looks like it needs another or 5 or 17 more. Now to find those bowling balls... ♥♥♥
Wednesday, June 6, 2012
2nd Graduation this year!
We've celebrated our 2nd graduation this year. My youngest graduated from High School just this weekend. Amazing! Simply Amazing.
He is bright, passionate, artistic, articulate, deeply compassionate and in my totally biased opinion, completely adorable! I, of course, cried. There are just so many emotions going on all the same time that it just wells up and spills over.
The ceremony was great. Not too long, not too short. The variety of the speakers, involvement of the students, songs by the senior choir members - all contributed to a 'just right' event. The weather was beautiful as well. We couldn't have asked for more. I'm one proud mama. Now it's off to college! Sigh, sniffle, joy.
I was re-reading this post and the two or three previous to it and realized how often I used the word amazing. Of course, these most recent posts have been about my sons and to be quite frank, they are amazing. They are not perfect and sometimes they drive me crazy but the truth is they are two of the most incredible, complex, loving, unique people I've ever known. At this point I feel I need to justify what others will read as bragging, but I'm not claiming their amazing-ness is a direct reflection of me. I totally get that who they are and who they are becoming is all about them and the miracles that God set in motion the day they were born. So yes, I feel pride for, but not ownership of, their accomplishments. I know I am one lucky woman to be here to witness these everyday miracles!
The ceremony was great. Not too long, not too short. The variety of the speakers, involvement of the students, songs by the senior choir members - all contributed to a 'just right' event. The weather was beautiful as well. We couldn't have asked for more. I'm one proud mama. Now it's off to college! Sigh, sniffle, joy.
I was re-reading this post and the two or three previous to it and realized how often I used the word amazing. Of course, these most recent posts have been about my sons and to be quite frank, they are amazing. They are not perfect and sometimes they drive me crazy but the truth is they are two of the most incredible, complex, loving, unique people I've ever known. At this point I feel I need to justify what others will read as bragging, but I'm not claiming their amazing-ness is a direct reflection of me. I totally get that who they are and who they are becoming is all about them and the miracles that God set in motion the day they were born. So yes, I feel pride for, but not ownership of, their accomplishments. I know I am one lucky woman to be here to witness these everyday miracles!
Thursday, May 24, 2012
Graduation Gift!
My oldest has graduated college. Sigh. Sniffle. Wide, wide, grin.
I really can't explain how amazing and wonderful and amazing it's been watching him progress through his college career. Amazing. I'm repeating myself, but I'll assume I'm forgiven since this has been one incredible year.
To celebrate him, I made a quilt. First, let me say I've never made anything of this magnitude before. I've made small quilts, as gifts, before. Small, as in wall hangings. And I've learned that quilting is not my special gift. Or should I say, making the seams line up is not my special gift. So, when I got it into my head that only a quilt would do to mark such an occasion some were skeptical. Okay, I was skeptical. But, the idea would not go away.
I have seen some amazing quilts in the blogging world and was inspired by strip quilts. No need to match the seams! After some perusal, consideration and pondering I jumped in with both feet. This was my plan... My graduate is a music major so I intended to buy any and all music themed fabric. I've used this type of fabric before and know it's usually black and white, so black and white was my planned color scheme. I was also going to embroider panels with images and words personal to him.
Two weeks before graduation (no that is not a joke - two weeks!) I ventured to my favorite fabric store and started picking fabric. Seriously no idea how much I needed. I focused on fat quarters because of the variety of fabrics available in the colors I wanted. I didn't want anything too feminine, but other than that I picked every single black, black and white fabric they had. I added in some gray fabric and you will see in the photos some orange fabric, which I'd planned to use as accent, but as the quilt was coming together, the orange just wasn't working. So out it went.
I stood in an aisle with all my choices spread across a flat surface mixing and matching until I found the most appealing balance of light to dark. It took some time, but was well worth it.
I found some music fabric at the store, but not enough, so I started looking online and found Fabric.com with several amazing fabric choices that I ordered. The arrived quickly and were top quality. I give them 2 thumbs up!
I started embroidering. My sewing machine is a combination sewing/embroidery, so I wanted all the embroidery to be finished before I started sewing. It took the better part of two days - I kid you not. The most challenging was getting his name as large as I wanted (which was significantly larger than my hoop) and lined up. This was especially tricky when factoring in the letter size and how a smidge on a computer screen translates into a noticeable difference on the finished product. Yikes! It was tricky, but so worth it to have his entire name in 2" letters across the quilt.
As I was embroidering images, I added silver metallic as an accent and it rocked. Just the right amount of punch. I embroidered his name, grad info, and then a ton of images of things important to him now and in the past. I decided to embroider only on white fabric and used a gray to black ombre thread, black thread, and silver thread. The white makes the embroidery pop and is the perfect foil for all the busyness in the fabrics.
It was during the embroidery process that I settled on 3 inch strips which would have a 2.5" finished size. Most of the images fit inside this parameter, but some did not. Once the fabrics were washed and ironed, I began cutting the strips. The fat quarters were fairly straight forward. I folded them all the same way, so the strips were roughly the same length. I decided to cut the full yards, ordered online, the full width of the fabric as they would help balance out his name panel, which stretches about 30 inches across. I did some math to determine how many strips I needed - basically, number of rows needed for the length I wanted multiplied by the number of strips it would take to make the row the width I wanted. I was counting on leftover fabric to be used for the back, which I did not want to strip piece, so I erred on the side of too few and ended up cutting three more strips to finish the quilt.
Next came seaming everything together. I just began picking up strips and sewing, adding embroidery as I went. I was flying by the seat of my pants and I thoroughly enjoyed the process. About half way through I thought, "hmmm... maybe I should see how these will look together." Yes. Half way. Can you tell I'm a novice or what? So, I cleared some space in the studio and started laying them out. I could immediately see which strips all roughly the same length, those pesky seams were awfully close together. Dang. If I left it that way, it would look like I couldn't match a seam to save my life, which though true I did not want the quilt to look like that. So, I began adding a little here and there or cutting through a strip to sew to something else.
A little trial and error, but in the end the rows looked fantastic. The embroidery well distributed. The fabrics evenly used, not touching itself, and a good flow from lights to darks. The top went together quite well. Fairly quickly (faster than the embroidery) and I was feeling pretty excited. I used the leftover music fabric for the back, but it wasn't quite enough. Into the stash I went. I found two black and white fabrics (which I buy if I find a deal as they are so versatile for the kinds of projects I make). One a harlequin and one a stripe. I decided to use the harlequin as the middle of the back. Though the rows of diamonds aren't quite straight, the overall effect is pretty cool.
The stripe became the binding. There is a video on YouTube showing how to fold 18" of fabric to get yards and yards of binding. I was able to bind this entire quilt by doing this process twice so with 1 yard of fabric. And it was easy. I highly recommend!
I also used another YouTube video for learning how to machine quilt a large quilt on a standard sewing machine. Seriously, you gotta love YouTube and the amazing people who share their knowledge! Basically, when all the layers were together, I pinned and pinned and pinned - with safety pins. Then I rolled up the quilt, put the walking foot on, and stitched along each seam from side to side. Now this was more complicated than it sounds as there was so much fabric. I'd stitch, pause and adjust, stitch some more. It took a long time and my arms got quite a work out! But, of all the steps thus far, this went the quickest although it was 4 hours worth of work.
Next came squaring up the thing. There is a whole nightmare story on how to square up a quilt, which someday I will document because I could not find anything helpful anywhere when I needed to figure out how to square it up. No book, no video, no blog, no message board - nothing. While I'm definitely a novice, I know I am not the only one who has ever had to try and square up a quilt project. So look forward to that. All I will say right here about it is Thank God for my husband! We squared it up, then using the yards and yards of binding, I attached that to the front of the quilt, using the walking foot. Then I hand sewed the binding to the back of the quilt. I did not get that part quite finished before graduation day and so was stitching for a few days after that.
So this is the finished project. I am pleased and proud of the project, but more importantly I'm thrilled because my son loves it, because it marks a big life event, and because he will be wrapped in love each and every time he uses it. ♥
I really can't explain how amazing and wonderful and amazing it's been watching him progress through his college career. Amazing. I'm repeating myself, but I'll assume I'm forgiven since this has been one incredible year.
To celebrate him, I made a quilt. First, let me say I've never made anything of this magnitude before. I've made small quilts, as gifts, before. Small, as in wall hangings. And I've learned that quilting is not my special gift. Or should I say, making the seams line up is not my special gift. So, when I got it into my head that only a quilt would do to mark such an occasion some were skeptical. Okay, I was skeptical. But, the idea would not go away.
I have seen some amazing quilts in the blogging world and was inspired by strip quilts. No need to match the seams! After some perusal, consideration and pondering I jumped in with both feet. This was my plan... My graduate is a music major so I intended to buy any and all music themed fabric. I've used this type of fabric before and know it's usually black and white, so black and white was my planned color scheme. I was also going to embroider panels with images and words personal to him.
Two weeks before graduation (no that is not a joke - two weeks!) I ventured to my favorite fabric store and started picking fabric. Seriously no idea how much I needed. I focused on fat quarters because of the variety of fabrics available in the colors I wanted. I didn't want anything too feminine, but other than that I picked every single black, black and white fabric they had. I added in some gray fabric and you will see in the photos some orange fabric, which I'd planned to use as accent, but as the quilt was coming together, the orange just wasn't working. So out it went.
I stood in an aisle with all my choices spread across a flat surface mixing and matching until I found the most appealing balance of light to dark. It took some time, but was well worth it.
I found some music fabric at the store, but not enough, so I started looking online and found Fabric.com with several amazing fabric choices that I ordered. The arrived quickly and were top quality. I give them 2 thumbs up!
I started embroidering. My sewing machine is a combination sewing/embroidery, so I wanted all the embroidery to be finished before I started sewing. It took the better part of two days - I kid you not. The most challenging was getting his name as large as I wanted (which was significantly larger than my hoop) and lined up. This was especially tricky when factoring in the letter size and how a smidge on a computer screen translates into a noticeable difference on the finished product. Yikes! It was tricky, but so worth it to have his entire name in 2" letters across the quilt.
As I was embroidering images, I added silver metallic as an accent and it rocked. Just the right amount of punch. I embroidered his name, grad info, and then a ton of images of things important to him now and in the past. I decided to embroider only on white fabric and used a gray to black ombre thread, black thread, and silver thread. The white makes the embroidery pop and is the perfect foil for all the busyness in the fabrics.
It was during the embroidery process that I settled on 3 inch strips which would have a 2.5" finished size. Most of the images fit inside this parameter, but some did not. Once the fabrics were washed and ironed, I began cutting the strips. The fat quarters were fairly straight forward. I folded them all the same way, so the strips were roughly the same length. I decided to cut the full yards, ordered online, the full width of the fabric as they would help balance out his name panel, which stretches about 30 inches across. I did some math to determine how many strips I needed - basically, number of rows needed for the length I wanted multiplied by the number of strips it would take to make the row the width I wanted. I was counting on leftover fabric to be used for the back, which I did not want to strip piece, so I erred on the side of too few and ended up cutting three more strips to finish the quilt.
Next came seaming everything together. I just began picking up strips and sewing, adding embroidery as I went. I was flying by the seat of my pants and I thoroughly enjoyed the process. About half way through I thought, "hmmm... maybe I should see how these will look together." Yes. Half way. Can you tell I'm a novice or what? So, I cleared some space in the studio and started laying them out. I could immediately see which strips all roughly the same length, those pesky seams were awfully close together. Dang. If I left it that way, it would look like I couldn't match a seam to save my life, which though true I did not want the quilt to look like that. So, I began adding a little here and there or cutting through a strip to sew to something else.
A little trial and error, but in the end the rows looked fantastic. The embroidery well distributed. The fabrics evenly used, not touching itself, and a good flow from lights to darks. The top went together quite well. Fairly quickly (faster than the embroidery) and I was feeling pretty excited. I used the leftover music fabric for the back, but it wasn't quite enough. Into the stash I went. I found two black and white fabrics (which I buy if I find a deal as they are so versatile for the kinds of projects I make). One a harlequin and one a stripe. I decided to use the harlequin as the middle of the back. Though the rows of diamonds aren't quite straight, the overall effect is pretty cool.
The stripe became the binding. There is a video on YouTube showing how to fold 18" of fabric to get yards and yards of binding. I was able to bind this entire quilt by doing this process twice so with 1 yard of fabric. And it was easy. I highly recommend!
I also used another YouTube video for learning how to machine quilt a large quilt on a standard sewing machine. Seriously, you gotta love YouTube and the amazing people who share their knowledge! Basically, when all the layers were together, I pinned and pinned and pinned - with safety pins. Then I rolled up the quilt, put the walking foot on, and stitched along each seam from side to side. Now this was more complicated than it sounds as there was so much fabric. I'd stitch, pause and adjust, stitch some more. It took a long time and my arms got quite a work out! But, of all the steps thus far, this went the quickest although it was 4 hours worth of work.
Next came squaring up the thing. There is a whole nightmare story on how to square up a quilt, which someday I will document because I could not find anything helpful anywhere when I needed to figure out how to square it up. No book, no video, no blog, no message board - nothing. While I'm definitely a novice, I know I am not the only one who has ever had to try and square up a quilt project. So look forward to that. All I will say right here about it is Thank God for my husband! We squared it up, then using the yards and yards of binding, I attached that to the front of the quilt, using the walking foot. Then I hand sewed the binding to the back of the quilt. I did not get that part quite finished before graduation day and so was stitching for a few days after that.
So this is the finished project. I am pleased and proud of the project, but more importantly I'm thrilled because my son loves it, because it marks a big life event, and because he will be wrapped in love each and every time he uses it. ♥
Subscribe to:
Posts (Atom)